

Chex mix recipe
During my childhood, family get-together always had a significance. There would be a big bowl of crispy and crunchy Chex mix on the table. It quickly disappeared, but the laughter to finish the snack remained.
Isn’t it great to know that in only about 15 minutes, you can create a delicious snack? This Chex mix recipe is your way to a snack that everyone will enjoy. It is perfect for game nights, parties, or just snuggling on the couch.
Whether you are a cooking, baking, or snack making pro, or just starting out, this homemade Chex mix is for you. You will make a batch of Chex mix with five ingredients that is better than the store-bought version.
Are you ready to whip up a snack that everyone will enjoy? Your food journey begins here!
Table of Contents
The Ultimate Guide to Traditional Chex Party Mix
Chex party mix has emerged as a popular snack that has taken family and friends gatherings to a different level. It has been cherished by food lovers in the United States for decades. Let’s taste the delicious world of conventional Chex mix, and the fascinating journey it has traveled.
Beginnings of a Legendary Snack
The story of classic Chex mix starts in the 1950s. Home cooks in kitchens across America had found a quick and easy way to entertain friends and family with a snack that gained popularity thanks to word-of-mouth. And Wheat Chex cereal was the foundation of what became an American party favorite.
Families enjoyed the mix for its ease of assembly, and possibility for customization to any taste profile.
- It emerged from the mid-20th century American kitchen
- Designed as an economical party snack profitably packaged for budget-conscious consumers
- Word-of-mouth quickly flourished and a hallmark of local community cookbooks began
Why Chex mix remains a beloved go-to
Chex party mix is a beloved crowd-pleasing snack for many reasons. It works for every occasion, from game night to holiday gatherings, and there is something about the savory sweetness and crunch that people love.
Here’s a reminder of why traditional Chex mix is a crowd-pleasing party mix to be enjoyed at family gatherings and celebrations, such as:
- It’s easy to make a lot of
- It’s customizable based on your seasoning options
- It’s nice to have a mix of flavors and textures
- It’s an affordable and celebratory, crowd-pleasing item
“Chex mix is more than a snack; it is common culinary tradition that binds people together.” – Culinary Historian
Whatever your gathering is, whether it is a small family gathering or a large celebration, traditional Chex mix is one option that is certain to please and deliver honest-to-goodness flavor reliably and every time. And never goes out of style.
Essential Ingredients for Perfect Chex Mix Recipe
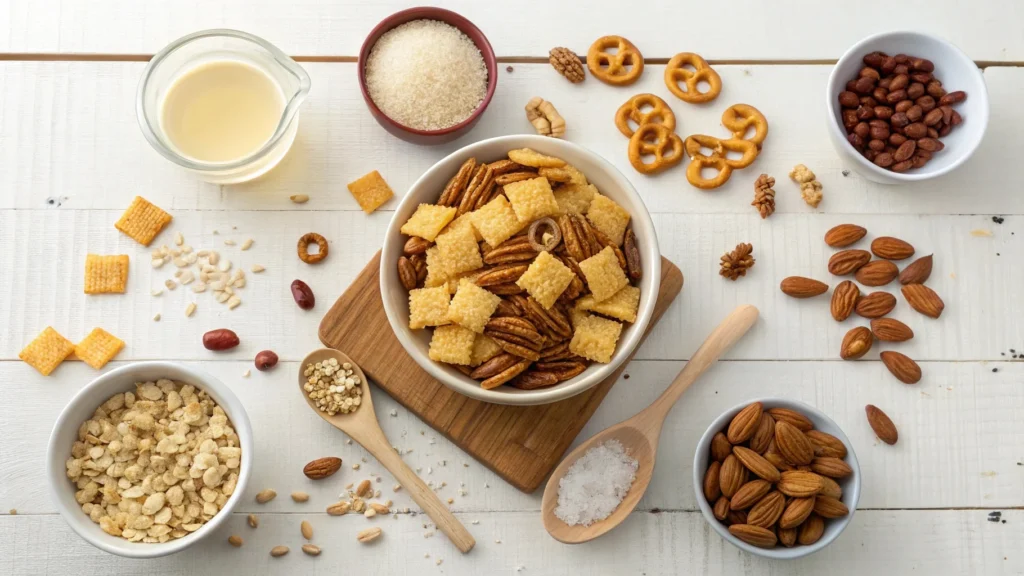
A perfect chex cereal mix starts with the perfect components. Your fresh mix needs assortment of components that will transform plain cereal into a beloved snack.
The most important component of a fabulous chex mix is of course chex cereal. You can use wheat, rice or corn chex. Each one gives special texture and flavor to the mix.
- Wheat Chex: earthy and nutty
- Rice Chex: crisp and light crunch
- Corn Chex: sweet and golden base
There is more than just chex in your mix. You need additional components for the richness and excitement:
- Pretzels: crunchy and salty
- Mixed nuts: protein and richness
- Bagel chips: crunchy and savory
- And seasonings: butter, Worcestershire sauce and spices.
The secret to a great chex cereal mix is creating balance! Try various measurements and see what is your perfect mix. The guests will appreciate the care you took in your homemade touch and unique flavors!
Kitchen Tools and Equipment You’ll Need
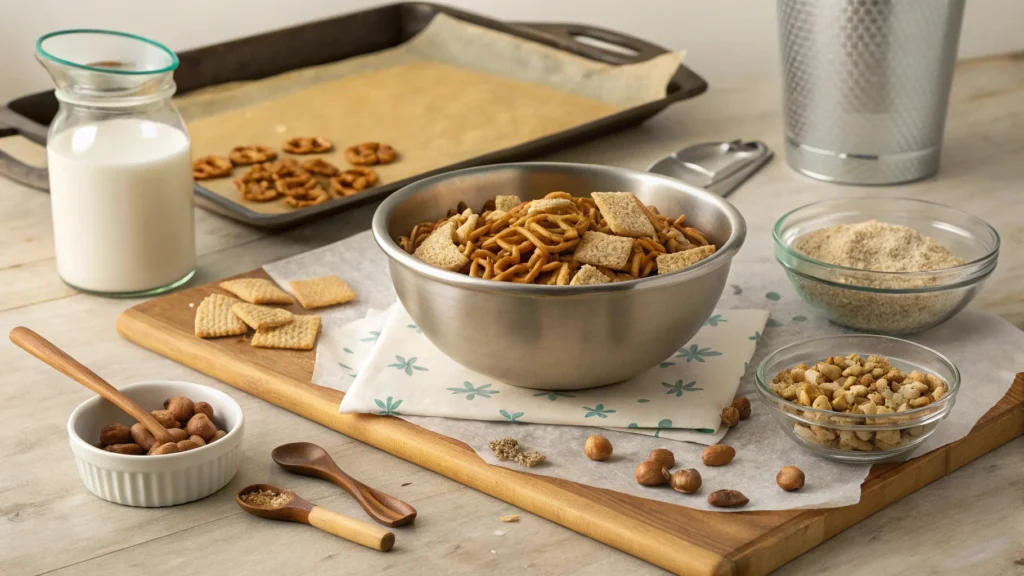
Preparing a delicious baked seasoned mix requires appropriate tools. Preparation in your kitchen is important prior to making the mix. The right tools will help to create a flavorful, crispy Chex
Mix that everyone will enjoy.
To make your Chex Mix, you will need to gather the following key kitchen tools:
- Large mixing bowl (with at least a 4-quart capacity)
- Rimmed baking sheet
- Wooden spoon or spatula
- Measuring cups and spoons
- Oven mitts
Baking sheets and mixing bowls
For a crispy snack, your baking sheet matters. A heavy-duty baking sheet is the best for even heat distribution.
You may choose from ceramic and metal baking sheets (or any other heavy-duty sheets). For mixing, make sure to choose a bowl that is large enough to hold all of the ingredients without spilling.
Temperature Control Suggestions
Temperature is critical when making your mix. Use an oven thermometer to ensure your recipe’s temperature. Most Chex Mix recipes will call for heat between 250°F and 275°F to achieve the best crispiness.
Storage Containers
Using the correct storage containers will ensure that your Chex Mix stays fresh with the desired crunch once it has cooled. Choose airtight containers with lids that close snugly. Glass or hard plastic containers are ideal as they are durable and help to eliminate moisture while maintaining your mix’s texture.
Step-by-Step Mixing and Seasoning Instructions
Creating the perfect chex mix recipe takes precision and attention to detail to make sure your savory snack mix is so full of flavor every bite is a blast! Here is where ingredient preparation and mixing techniques come into play.
First thing, gather all your ingredients before you start mixing. You cannot get all the ingredients measured out and prepared as you need to, your chex mix will not turn out as well. A great chex mix recipe requires you pay attention to detail and be precise in measuring and coating.
- Be precise in measuring your cereals and dry ingredients.
- Prepare your seasoning mixture.
- Put ingredients together in a precise, methodical way.
- Make sure all components of the mix are coated evenly.
You will want to have a large mixing bowl when making your savory snack mix. When folding the cereal pieces together, you want to be gentle, so you do not break the more delicate cereal into little pieces.
| Mixing Technique | Purpose |
| Gentle Folding | Prevents cereal breakage |
| Even Coating | Ensures consistent flavor distribution |
| Slow Stirring | Maintains ingredient integrity |
Your method of seasoning is critical. Important: Always whisk all the seasonings together thoroughly first, prior to adding them to your mixture, and stir gently enough to coat all of the pieces evenly.
- Use a whisk to sprinkle the spices for uniformity
- Pour seasonings a little at a time
- Progress from the bottom to the top
Most experts recommend using a rubber spatula for mixing. It will coat the seasonings evenly while getting the mixture ampoiled without being too intrusive with fragile ingredients.
Baking Techniques for Crunchy Recipes
When it comes to creating the best crunching and munching snack, precision and detail are necessary. Pursuing a crunchy and delicious oven-baked snack revolves around the relevant application of key baking mediums, which can transform simple products into a delightful treat. Using the appropriate strategy/medium will allow your Chex Mix to be extremely crispy as the crunch is irresistible!
Best oven temperature.
Achieving a crunchy snack begins at the temperature! To create the best uniform, oven-fired snack, set the oven to 250 oF (120 oC) and let it bake. In this scenario, low and slow creates a non-burning temperature that will crisp up your snack perfectly.
- Always preheat the oven before adding your mix
- Use a quality oven thermometer to ensure accuracy.
- Fast, higher temperatures can jeopardize burning of the ingredients and simply make it crispy.
Strategic stirring mediums.
The best way to achieve even cooking in baked snacks is consistent stirring. Every 15 min mix up gently all of the Chex Mix. This technique will allow each piece to receive good heat at the same time.
| Baking Time | Stirring Frequency | Purpose |
| 0-15 minutes | First stir | Distribute initial heat |
| 15-30 minutes | Second stir | Prevent uneven browning |
| 30-45 minutes | Final stir | Ensure complete crispness |
Cooling for Maximum Crunch
Cooling is very important for the ultimate texture. After baking, spread your mix on parchment paper and allow to cool completely. Be patient; rushing is the quickest way to ruin the crunchy texture you’ve devoted so much time to creating!
- Use a big, flat surface for cooling
- Allow about 30-45 minutes for cooling
- Do not cover until completely cool
Creative Variations and Flavors
Your old-fashioned sweet or savory snack mix, doesn’t have to be so simple! There are so many ways to change it up and still have a delicious snack mix for people to enjoy! For example, with just a few tweaks you can create and bring exciting flavors everyone will enjoy!
These are creative ways you can make your homemade Chex mix even more delicious:
- Spicy Southwest Style: Add chili powder, cumin, and cayenne pepper for a spicy boost
- Mediterranean Inspired: Use dried oregano, rosemary, and powdered garlic.
- Asian Fusion: Incorporate sesame oil, soy sauce, and wasabi powder.
- Chocolate Covered & Sweet with Salty: Melt dark chocolate and drizzle on top and sprinkle with sea salt.
When you’re experimenting with your snack mix, you may want to consider the following guidelines.
- Start by trying small batches to experiment with different combinations
- Utilize fresh spices for the biggest flavor bang for your buck
- Pay attention to the sweet, salty, and spicy balance
- Let your mix cool all the way to maintain its crispness
Customizing your Chex mix recipe means being able to create your new snack whenever you want! Don’t be afraid to try something new to find your mix!
Storage Properties for Staying Fresh

In order to stay fresh, homemade Chex mix needs proper storage. If you follow the appropriate storage methods, this holiday snack can remain delicious for weeks. Using the right container and storage method will keep your snack crunchy and tasty.
Proper storage is the key to the quality of your Chex mix. An airtight container is your friend in keeping this snack crunchy.
Best Containers for Chex Mix
- Glass containers that have fitted lids
- Plastic Tupperware that has seal-lock features
- Ceramic cookie jars that have rubber seals
- Vacuum-sealed bags for sealed freshness
Shelf Life Guidelines
| Storage Method | Room Temperature | Refrigerated |
| Airtight Container | 1-2 weeks | Up to 3 weeks |
| Vacuum-Sealed | 2-3 weeks | Up to 1 month |
Store your snack away from direct sunlight and heat. Chex mix can get stale rapidly if the temperature fluctuates, and if it gets soft, you can always heat it in an oven set to 250°F for 5-10 minutes. Pro tip: write the prep date on the container so everyone knows how funky they can go with your homemade Chex mix! Common Mistakes to Avoid When
Common Mistakes to Avoid When Making Homemade Chex Mix
Crispy, delicious, and flavorful homemade Chex mix is not as easy to prepare as you might expect. Even the most experienced cooks make common mistakes in Chex mix now and then, leaving the perfect homemade Chex mix a little disappointing! Knowing common mistakes will help you to create a chex cereal mix that is crunchy, tasty, and irresistible!
- Overcrowding the Baking Sheet – Putting too much in one batch is bound to cause uneven toasting. Give each piece of your homemade Chex mix room to crisp up correctly.
- Not Paying Attention to the Oven Temperature – Baking at too high or low of a temperature will ruin your chex cereal mix. Use the suggested temperature of 250°F for slow and even roasting.
- Not Stirring the Chex Mix – Not stirring every 15 minutes means uneven browning and burnt pieces.
Seasoning is another huge factor in making really great homemade Chex mix. Many people under-season or use stale spices. Using fresh seasonings and not going too heavy is key to making a great snack.
“The difference between good chex mix and great chex mix are the details.” – Snack Enthusiast
In addition to those main mistakes, look out for:
- Using butter substitutes that too easily burn
- Not allowing the finished product to cool completely before storage
- Storing in containers that are not airtight
Using the pointers above to recognize common mistakes will take your homemade Chex mix from everyday to extraordinary. Also, practice makes perfect, and each round of Chex mix will have you dialing in your method.
Conclusion
Crafting your own Chex Mix is more than just cooking; it’s an opportunity to make a tasty treat that’s great for sharing with others. You can make something that is even better than something purchased with a mere 5 ingredients and the most simple procedure imaginable!
The great thing about homemade Chex Mix is the variety! You can play with seasonings and levels of spices to your liking. Great for game day, family movie night, or anytime you want a great snack.
Let’s explore Chex Mixing! Feel free to share your flavors on social media, swap recipes with others or just enjoy it. Your homemade Chex Mix is more than just food, it is an experience. It is food you will share with others.
Get after it today! Enjoy the experience of making a snack that spurs conversations and brings smiles. The best recipes are made with love, passion and originality!
FAQ
How long does homemade Chex Mix last?
Homemade Chex Mix has a lifespan of about 1-2 weeks. You can keep your Chex Mix in a sealed container at room temperature. Just make sure you keep it away from moisture and sunlight to keep it yummy!
Can I make Chex Mix in advance for a party?
Yes, you can make Chex Mix about 3-4 days in advance of the party. You can keep your Chex Mix in a sealed container at room temperature. As long as it is sealed, it should be crunchy and non-stale, and a great party snack!
Are there gluten-free options available for making Chex Mix?
Yes there are! Just use gluten-free Chex cereal, and double check the boxes that all your items are gluten-free. If you or your guests are gluten sensitive, I recommend using Rice Chex and Corn Chex!
What is the best way to make a spicy version of Chex Mix?
If you’re looking to add heat to your Chex Mix, you can certainly do so using cayenne pepper, red pepper flakes, or hot sauce. Start slow and build it up to your liking. If you want even more heat, you can use spicy nuts or chili-seasoned nuts and cheeses.
Can I microwave Chex Mix instead of using the oven?
You can microwave Chex Mix, but the check mix will have a different taste! Using a microwave lacks the crunchy texture and sealing in the flavor that baking provides. If you microwave your Chex Mix, still make sure you set the microwave for short intervals and remember to stir often.
What are the best nuts to put into Chex Mix?
Mixed nuts are always a great choice. Although peanuts, almonds, and cashews are great. If you’re worried about peanuts, raw or unsalted nuts are a great choice. Pecans and walnuts are also great nuts to use for flavor and crunch.
How can I keep my Chex Mix from getting soggy?
If you want to keep your Chex Mix crispy after baking, bake at 250 degrees. Stir your Chex Mix every 15 minutes and let cool completely after baking before storing. Store in an airtight container to keep moist air out.
Can I create a sweet version of Chex Mix?
Yes! You can use brown sugar, cinnamon, vanilla, or even chocolate chips and make a sweet version of dessert Chex Mix! In fact, you can also try making Muddy Buddies, or try something like a cinnamon-sugar mix for your dessert snack!